|
|
Chess Engine Installation in Aquarium
Follow the steps described below:
1st Step: Copying the Engine
Copy the chess engine to a directory on your computer.
2nd Step: Starting the Program
Open Aquarium.
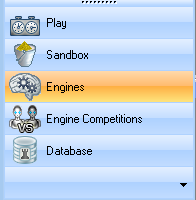
3rd Step: Add
Go to engine mode and click on the "Add" button as shown in the pictures:
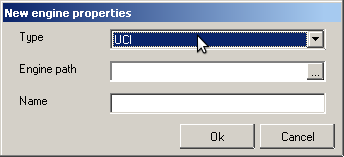
4th Step: Selecting Type and Path
A new window opens. Select "UCI" as type.
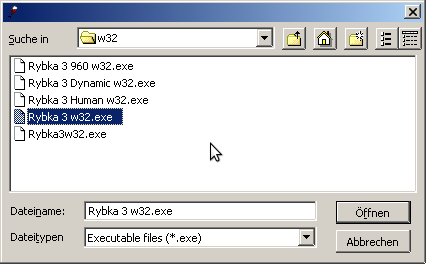
Click on the "..." button in the Engine path row, search the folder you copied the engine to and select the engine you want to install (e.g. Rybka 3 w32.exe). Press "Open".
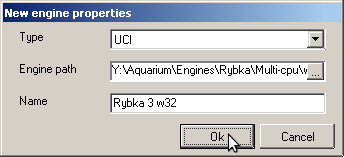
5th Step: Finishing the Installation
Now you can press OK.
The Engine should appear in the engines list now:

In this list, you can also select the hash size for the engine (fifth column). Rybka uses the hash to remember the positions it has searched, so a bigger hash table will slightly increase the engine strength. A good hash table size is usually your computer's RAM divided by 4. Note that Rybka can only use powers of 2 as hash size, ie. 1, 2, 4, 8, 16, 32, 64, 128, 256, 512, 1024 or 2048 MB.
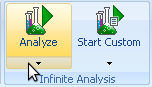
6th Step: Starting Infinite Analysis
Go to sandbox or database mode and press the little arrow at the bottom of the "Analyze" button.
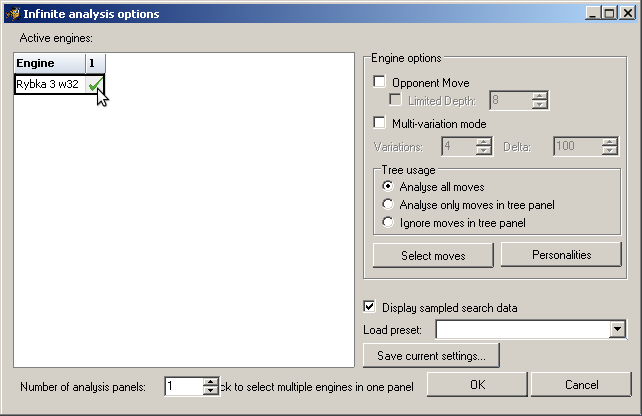
Check the square next to the engine name as shown in the picture and press OK.
Now you can start analysing by pressing the "Analyze" button.

That's all. Enjoy your analysis with Rybka!
If you have further questions, you may want to read the Aquarium FAQ or visit our forum.
|
|
|